
DTA Emulator
By
@anchith

- 5 Devlogs
- 40 Total hours
An emulator for a simple DTA processor
By
@anchith
An emulator for a simple DTA processor
5h 31m 52s logged

I finally got the 3D renderer to work  It took SO long (18+ hours in total?
  ) but it’s so cool and really shows the capabilities of this tiny CPU

It took so long to make because I had to write everything in assembly with 🚫 no functions, 🚫 no control structures and 🚫no variables 

Obviously trying to program this CPU with such a tiny ISA and a stupid assembler is borderline impossible - you have to manually deal with register/pin addresses and memory addresses for jumps, so adding a single line changes everything after it and breaks your jumps. 
That’s why I added a few features to the assembler to make my life easier, namely address markers and constants.
)Additionally, I also introduced a dynamic constants thing in the assembler, which basically just reserves memory addresses and stuff for constants on it’s own, so now I don’t even need to think about those addresses.
I added a new ALU (Arithmetic & Logic Unit) function in the CPU for comparisons between two numbers.
The new COMP ALU operation compares the two values in ALU_A and ALU_B and sets the output to:
Trying to make a 3D renderer without these functions is impossible 
Ok, now onto how the renderer actually works.
The renderer is just one big program (1300+ lines of assembly) that does a bunch of stuff to try and render a spinning cube on the display. Basically all it does is:
 Initialize the cube vertices
 Make the edge table for the lines of the cube
 Rotate all the points of the cube by a set amount every frame using a lot of scary math
 Draw all the lines of the cube and refresh the display
 Repeat from step 3
Here’s a very simplified explanation of the entire program:
The initial positions of the points is hardcoded into the code, and there’s also a getVertex function to get the X, Y and Z coordinates for a specific vertex number.
To rotate the points, you need to do some matrix multiplication  on each of the points, with a rotation matrix thingy and magically rotation happens.
I don’t actually know what sin/cos is, they didn’t teach us in school yet as far as I know it’s something to do with the angles of a right angle triangle or whatever who cares
To find the rotated points, it takes each of the coordinates and multiplies X by cos theta + Z * sin theta, and multiplies Z by -X * sin theta + Z * cos theta, where theta is the value it is being rotated by. Sin and Cos values for values 0-90 degrees are hardcoded into the program because it’s very hard to calculate 
Then the program takes those rotated points, and projects them into 2D points. Those equations are much easier:
Projected X = (X * FocalLength)/(Z+FocalLength)
and similarly,
Projected Y = (Y * FocalLength)/(Z+FocalLength)
Then it draws the lines between the points using a hardcoded edge table and bresenham’s line drawing algorithm.
It then releases the pixel buffer and gets ready to draw another frame!
And after a lot of debugging, it’s finally finished! 
(The video is at 500 kilohertz btw  )
)
13h 38m 21s logged

So I was working on a 3D rendering program
Writing a whole 3D render in assembly was slightly overambitious I think. It took thousands of lines of code and hundreds of memory allocations, functions and random stuff.
It is supposed to be able to do rotation, projection, and wireframe drawing, and I tried making it draw a simple cube.
As of right now it doesn’t work. Debugging DTA assembly is hard especially when you have 1400 lines of it. (i thought of splitting it up into several files, but the way that it’s assembled and stuff makes it difficult, I still do have many files but I merge them all before assembling)
There’s some problems with the math and conditional stuff and if i try to run the whole renderer the screen just shows one pixel at coordinates (0, 0) flickering.
But I was able to program a functional line drawing algorithm based on generalized Bresenham’s line drawing algorithm! (see picture) It basically works by taking two start and end coordinates, and adjusting the x towards the end coordinate, while measuring the error of the y-coordinate from the ideal line and adjusting for it. idk im bad at explaining things.
I’ll probably write more about this in detail once I get the 3D renderer fully working.

5h 19m 38s logged

I made an assembler now so that I don’t have to write the raw ROM bytes to write programs!
You can now just write code in assembly and it will magically generate the perfect ROM values!
It can do a lot of cool stuff like:
set pc, bruh to jump to the instruction you labelled “bruh” for some reason

The label thing is especially useful because I don’t need to rewrite a bunch of stuff just to add some code, and I don’t need to think about instruction addresses at all now because it all happens automagically with the assembler!
I also created a bunch of new programs using this assembler, that use some of the new device stuff as well. speaking of device stuff,
I changed the architecture of the DSC a lot and now there are separate pulse pins that you can use to talk to the device. This makes working with devices a little bit easier and uses lesser code as well!
With the new architecture I made some new devices as well, like:
 A colour GPU Now you can draw pixels to the screen that aren’t black and white! It actually includes all 0-255 values for red, green and blue, like all modern gpus and displays have
 Work in progress text renderer terminal thing
 Power Management Thing™ so that programs can view and adjust the processors clock speed
I also made one of those cool GPU test gradient things for the new GPU  It does a lot of math and loop stuff to figure out which color should be at which position. I wrote it in like 80 lines of assembly using the new assembler and it takes about 16 seconds to finish at 10 kilohertz.
This is the picture of the output:

5h 39m 25s logged
I worked on the backend of the emulator a lot. I coded the remaining parts of all of the components, then I made a clock and finally put everything together to make the working emulator.
The processor can now execute all three DTA instructions properly: COPY, SET, and PULSE The instruction decoder reads the instruction words, figures out what operation needs to happen, and the processor performs it through the appropriate registers and pins.
There were also a bunch of weird bugs like components not being able to update their own read-only registers and memory size limits
A processor isn’t very useful without any output devices so I made a GPU device to output pictures.
It has a 64x64 pixel screen to which the processor can write pixels to. It has only black and white pixels because… i was lazy ig 
I then tried running some programs on it!
Like one that continuously tries to write to read-only registers and throws infinite errors! ok that one was for testing
I tried making a program that actually uses the screen, and I thought of just drawing a checkerboard pattern on the screen.
Unfortunately I was too ambitious and it didn’t work. at all.
So i tried just drawing one pixel to the screen and WOW IT WORKED! no it didnt it still did nothing
I did a bunch of backend debugging stuff which is really boring and complicated and I had to move the device register update code in the DSC to its own pin and trigger method and akcgcrwqajhxte tldr a bunch of confusing stuff 
Finally i got the pixels to work! There was now one white pixel on the screen! exciting!
I had to do a lot more debugging for the checkerboard thing to work. I didn’t make an assembler as of now, so I had to write all the machine code myself  (Literally writing with numbers)
And catching bugs was impossible because again, you’re looking at a bunch of numbers. Anything as simple as adding a line of code was a pain because it shifts the memory addresses of all the lines of code after that, which messes with jump conditions and stuff.
Despite all that IT WORKED it does run quite slow because its more than 30 instructions for each iteration of the loop, it takes a few seconds for it to finish the image at a clock speed of 10 kilohertz.
This is basically how the program works:
And then start running an infinite loop in which all this happens:
PIXEL instruction, X coordinate, Y coordinate and pixel colour to the GPU via the DSC.All that generates this cool checkerboard pattern on the screen.
(This is 44 lines of assembly )
Anyway look at this picture:

10h 15m 17s logged
I’m making an emulator for a processor!
It’s supposed to be a very simple minimal instruction set computer, with only 3 instructions.
I mostly worked on the ISA in these hours and also did a bit of backend work for the emulator.
The instruction set for the processor has only 3 instructions:
The entire processor can be controlled just by changing the values in registers and pulsing stuff.
Copy copies the value of one register to another
Set directly sets the value of a register to something 
Pulse pulses a pin 
(This is also why it’s called DTA - Data Transfer Architecture)
With these simple instructions, you can manipulate registers and therefore control various parts of the processor! 
Designing the processor ISA was very hard because there are a bunch of problems that arise from having only three instructions.
For example, this is how you would write a program to add two numbers from the memory and save it back to the memory.:
SET READADDR 1
COPY READOUT, ALU_A
SET READADDR 2
COPY READOUT, ALU_B
SET ALU_OP, ADD
SET WRITEADDR 3
COPY ALU_OUT, WRITEVAL
PULSE WRITE
This code first sets the read address to 1, causing the register bank’s read output to provide the value stored at address 1.
That value is then copied into ALU_A.
The read address is then set to 2, and the value at that address is copied into ALU_B.
ALU_OP is set to ADD.
Finally, the write address is set to 3. The ALU output is copied into WRITEVAL, and the write operation is pulsed, storing the result at address 3 in the register bank.
So basically, at a high level, it reads 2 values from the memory, copies them to the ALU input values, sets the ALU operation to addition, then saves the output back into the memory.
The memory reading and ALU output is combinational, ie it works continuously, and does not need a pulse for it to work. Meanwhile writing stuff to the memory can’t just be on forever, that would create problems. So we need to pulse it when it’s ready to write. You can think of pulses like triggering something
Hopefully you’re understanding 
The parts of the CPU are:


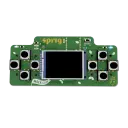
(this took way too long 🤦 )
That’s about it for the ISA. I also started working on the backend of the actual emulator by implementing all of these components individually in Java  (java peak )
A picture of all the registers and pins:

